Dive into our expert insights on crafting professional and print-ready templates using GIMP, the beloved free alternative to premium design software. From business cards to eye-catching posters, unfold the full potential of your creativity without leaving a dent in your wallet.
Embark on your design adventure by understanding the cornerstone of print design – creating robust and versatile templates in GIMP. Our step-by-step guide illuminates the pathway for beginners and seasoned designers alike, focusing on setting up your canvas for print perfection.
GIMP Print Design Tutorial
Whether it’s your first or hundredth time, our GIMP tutorials tailored for print design ensure a smooth transition from screen to paper. Experience hassle-free sessions as we delve into common pitfalls and pro tips, ensuring your designs translate beautifully in print.
1. Setting Up Your Project
Before you start, setting up your GIMP workspace correctly is crucial.
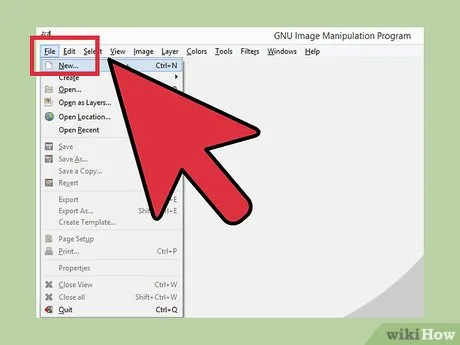
- Create a New File: Go to
File>Newto create a new project. Here, you’ll need to set your parameters. - Choose the Right Dimensions: Whether it’s an 8.5″x 11″ flyer or a standard 3.5″x 2″ business card, input the correct dimensions.
- Resolution Settings: Set the resolution to at least 300 DPI (dots per inch) for high-quality print output. This setting is found under the
Advanced OptionsorImage Propertiessections.
2. Designing With Precision
Accuracy is key in print design, as what you see on screen should match the printed result.
- Use Guides and Grids: Under the
Viewmenu, activateSnap to GridorSnap to Guidesto ensure alignment accuracy. You can customize grid lines underImage>Configure Grid. - Manage Color Profiles: Printers interpret colors differently than screens. Use CMYK color profiles if possible, though be aware that GIMP primarily uses the RGB color model and adjustments may be necessary for print accuracy.
3. Organizing Your Layers
Layer management is integral to a non-destructive and flexible design process.
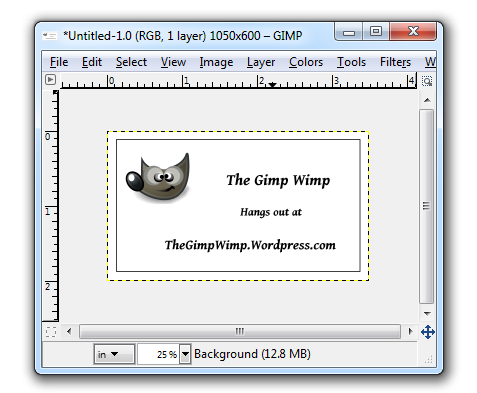
- Separate Elements: Use separate layers for text, images, and other graphic elements. This method simplifies edits and revisions.
- Name Your Layers: Keep your layers organized with descriptive names to navigate easily through your project elements.
Printable Template Design with GIMP
Unleash GIMP’s full prowess by mastering template designs ready for print. Learn about integrating elements, balancing whitespace, and prepping your masterpiece for the physical world. Perfect for DIY enthusiasts ready to bring their virtual creations into tangible treasures.
GIMP Template Dimensions for Printing
Size matters in print projects! Navigate the complexities of print dimensions with our simplified guides. Learn how to set ideal resolutions, dimensions, and layouts in GIMP, ensuring your projects mirror professional standards.
1. Understanding Print Dimensions and Resolution
The dimensions you set for your GIMP project dictate the physical size of the artwork when printed. Whether creating business cards, posters, or brochures, each product has standard dimensions you should adhere to.
- Standard Dimensions: Common print sizes include 3.5″x 2″ for business cards, 8.5″x 11″ or A4 for standard documents, and varying dimensions for posters depending on the intended use.
- Resolution Quality: For a crisp print, your design should be set at 300 DPI (dots per inch), the standard high-resolution print quality. This setting ensures your printed piece looks as clear as it does on your screen.
2. Setting Up Your GIMP Document
Begin your project with precision by configuring your template dimensions before designing.
- Create a New File: Start by selecting
File>New. A dialog box appears for you to enter your template’s dimensions and resolution. - Input Dimensions: Enter the width and height corresponding to the final print size you desire. Remember, this is measured in inches or millimeters, not pixels.
- Adjust Resolution: Change the resolution field to 300 DPI to ensure high quality for printing.
3. Considerations for Full Bleed Printing
If your design extends to the edge of the paper (known as a full bleed), additional steps are necessary.
- Extend Dimensions: Increase your workspace slightly beyond standard dimensions, usually by 0.125 inches (3 mm) on all sides. This extra space accounts for the bleed area that gets trimmed after printing.
- Safe Zone Configuration: Keep critical elements (text, logos) within a safe zone, slightly inside your document’s final dimensions, to prevent them from being trimmed.
Customizing Print Templates in GIMP
Discover the art of customization with GIMP. Transform basic templates into stunning, personalized designs with insider tweaks and advanced tools. Ideal for those looking to add a unique touch to their printed projects.
Printable Template Software Options
Explore a universe beyond GIMP with our unbiased compilation of software options catering to diverse printing needs. From freeware to premium suites, we’ve covered all bases to equip you for your next big project.
Free Print Template Creation Tools
Dive into the world of free resources that complement GIMP’s toolbox, enhancing your design process. Perfect for designers on a budget looking for quality without compromise.
Designing Business Cards in GIMP
Your business card is your handshake. We’ll walk you through designing business cards in GIMP that people remember, blending aesthetics with professionalism.
In the digital age, a business card is a tangible touchpoint that can leave a lasting impression. Designing your own need not be a daunting task – with GIMP, creating a professional-looking business card is both achievable and enjoyable. This guide will walk you through the process of designing a business card in GIMP, from setting up your file to the final export for printing.
Creating Flyers in GIMP
Flyers don’t have to be mundane! Design captivating flyers using GIMP, with expert tips on layouts, typography, and images that resonate with your audience.
Printable Brochure Design in GIMP
Craft informative and appealing brochures right from your GIMP workspace. Ideal for marketing maestros and enthusiastic beginners eager to make an informational impact.
GIMP Poster Template Tutorial
Big format, bigger impression! Learn the A-Z of poster designing in GIMP, ensuring your final print is as stunning as your original vision.
1. Preliminary Considerations
Before you jump into GIMP, it’s crucial to have a clear idea of your poster’s purpose and audience.
- Identify the Objective: Are you promoting an event, advertising a product, or raising awareness? Your goal directly influences your design choices.
- Know Your Audience: Design with an audience in mind. A poster for a music festival will look drastically different from a corporate event promotion.
2. Setting Up the GIMP Workspace
Now, let’s prepare your digital canvas.
- Launch the Project: Open GIMP and start a new project by navigating to
File>New. A prompt will ask for your desired dimensions. Standard poster sizes are often 24 inches by 36 inches, but they can vary based on your needs. - Resolution Settings: Set the resolution to 300 DPI for high-quality printing. This detail is crucial for ensuring your poster looks sharp and professional off the press.
Print Layout Techniques in GIMP
Elevate your layouts from good to great. We reveal techniques that professional designers use to enhance visual flow and information presentation in their print projects.
1. Understanding Print Layout Fundamentals
Before diving into GIMP’s specific tools, one must understand the principles underpinning effective print layout.
- Maintain Consistency: Use consistent fonts, colors, and graphic styles. This uniformity reinforces brand recognition and improves readability.
- Hierarchy and Flow: Organize information using a clear hierarchy. Guide the reader’s eyes through the layout using different font sizes, bolding important text, and arranging elements strategically.
2. Setting Up GIMP for Print Design
Preparation is key to preventing hiccups later in the printing process.
- Create a Template: Start with a template with predefined dimensions based on your project (e.g., A4 for brochures, and custom dimensions for posters). Include bleed and margin guidelines to ensure critical elements aren’t cut off during printing.
- Resolution and Color Mode: Set your document to 300 DPI for professional print quality. Use the CMYK color mode if supported by your GIMP version or plugin, as it’s standard for printing.